基于 Laravel + Vue + GraphQL 实现前后端分离的博客应用(二) —— 用户列表及详情页
创建菜单组件
书接上文,用户登录成功之后会进入管理后台,为此我们需要为后台界面编写导航菜单组件。还是在 components/Admin 目录下创建一个 Menu.vue:
<template>
    <aside class="menu">
        <p class="menu-label">文章</p>
        <ul class="menu-list">
            <li>
                <router-link to="/admin/posts/new">新文章</router-link>
            </li>
            <li>
                <router-link to="/admin/posts">文章列表</router-link>
            </li>
        </ul>
        <p class="menu-label">用户</p>
        <ul class="menu-list">
            <li>
                <router-link to="/admin/users">用户列表</router-link>
            </li>
        </ul>
    </aside>
</template>
显示用户列表
后端接口实现
获取用户列表的接口我们已经在 API 系列教程四中编写过了,为了适配这里的查询需要,我们将其略作调整。
先到配置文件 config/graphql.php 中修改下查询名称:
'schemas' => [
    'default' => [
        'query' => [
            'allUsers' => \App\GraphQL\Query\UserQuery::class,
            ... // other queries
        ],
        ... // mutations
    ]
],
然后到 UserType 类的 fields 方法返回字段中新增一个返回字段 name:
'name' => [
    'type' => Type::nonNull(Type::string()),
    'description' => 'The name of the user'
],
这样就可以在 GraphiQL 中测试了:

前端用户列表
定义 GraphQL Query
后端接口准备好了之后,接下来在前端管理后台我们希望能够看到所有已注册用户。这需要创建一个 Users 组件,在此之前还要在 src/graphql.js 中编写 GraphQL 查询语句获取所有注册用户:
export const ALL_USERS_QUERY = gql`
    query AllUsersQuery {
        allUsers {
            id
            name
            email
        }
    }
`
创建 Users 组件
接下来在 components/Admin 目录下创建 Users.vue 文件来定义 Users 组件:
<template>
    <section class="section">
        <div class="container">
            <div class="columns">
                <div class="column is-3">
                    <Menu/>
                </div>
                <div class="column is-9">
                    <h2 class="title">用户列表</h2>

                    <table class="table is-striped is-narrow is-hoverable is-fullwidth">
                        <thead>
                        <tr>
                            <th>用户名</th>
                            <th>邮箱</th>
                            <th></th>
                        </tr>
                        </thead>
                        <tbody>
                        <tr v-for="user in allUsers" :key="user.id">
                            <td>{{ user.name }}</td>
                            <td>{{ user.email }}</td>
                            <td>
                                <router-link :to="`/admin/users/${user.id}`">查看</router-link>
                            </td>
                        </tr>
                        </tbody>
                    </table>
                </div>
            </div>
        </div>
    </section>
</template>

<script>
import Menu from '@/components/Admin/Menu'
import { ALL_USERS_QUERY } from '@/graphql'

export default {
  name: 'Users',
  components: {
    Menu
  },
  data () {
    return {
      allUsers: []
    }
  },
  apollo: {
    // fetch all users
    allUsers: {
      query: ALL_USERS_QUERY
    }
  }
}
</script>
这段代码中用到了前面创建的 Menu 组件,在 apollo 对象中,我们添加了一段获取所有用户的 GraphQL 查询,其中用到了 ALL_USERS_QUERY 操作(这里用到的名字 allUsers 需要和 GraphQL 服务端中定义的查询名字一样),一旦从服务端获取到用户数据后就会将其渲染到前端视图中,此外我们还为每个用户提供了链接跳转到用户详情页。
添加用户列表路由
在 src/router/index.js 的合适位置注入以下代码:
import Users from '@/components/Admin/Users'

// 将下面的代码插入 `routes` 数组最后
{
  path: '/admin/users',
  name: 'Users',
  component: Users
}
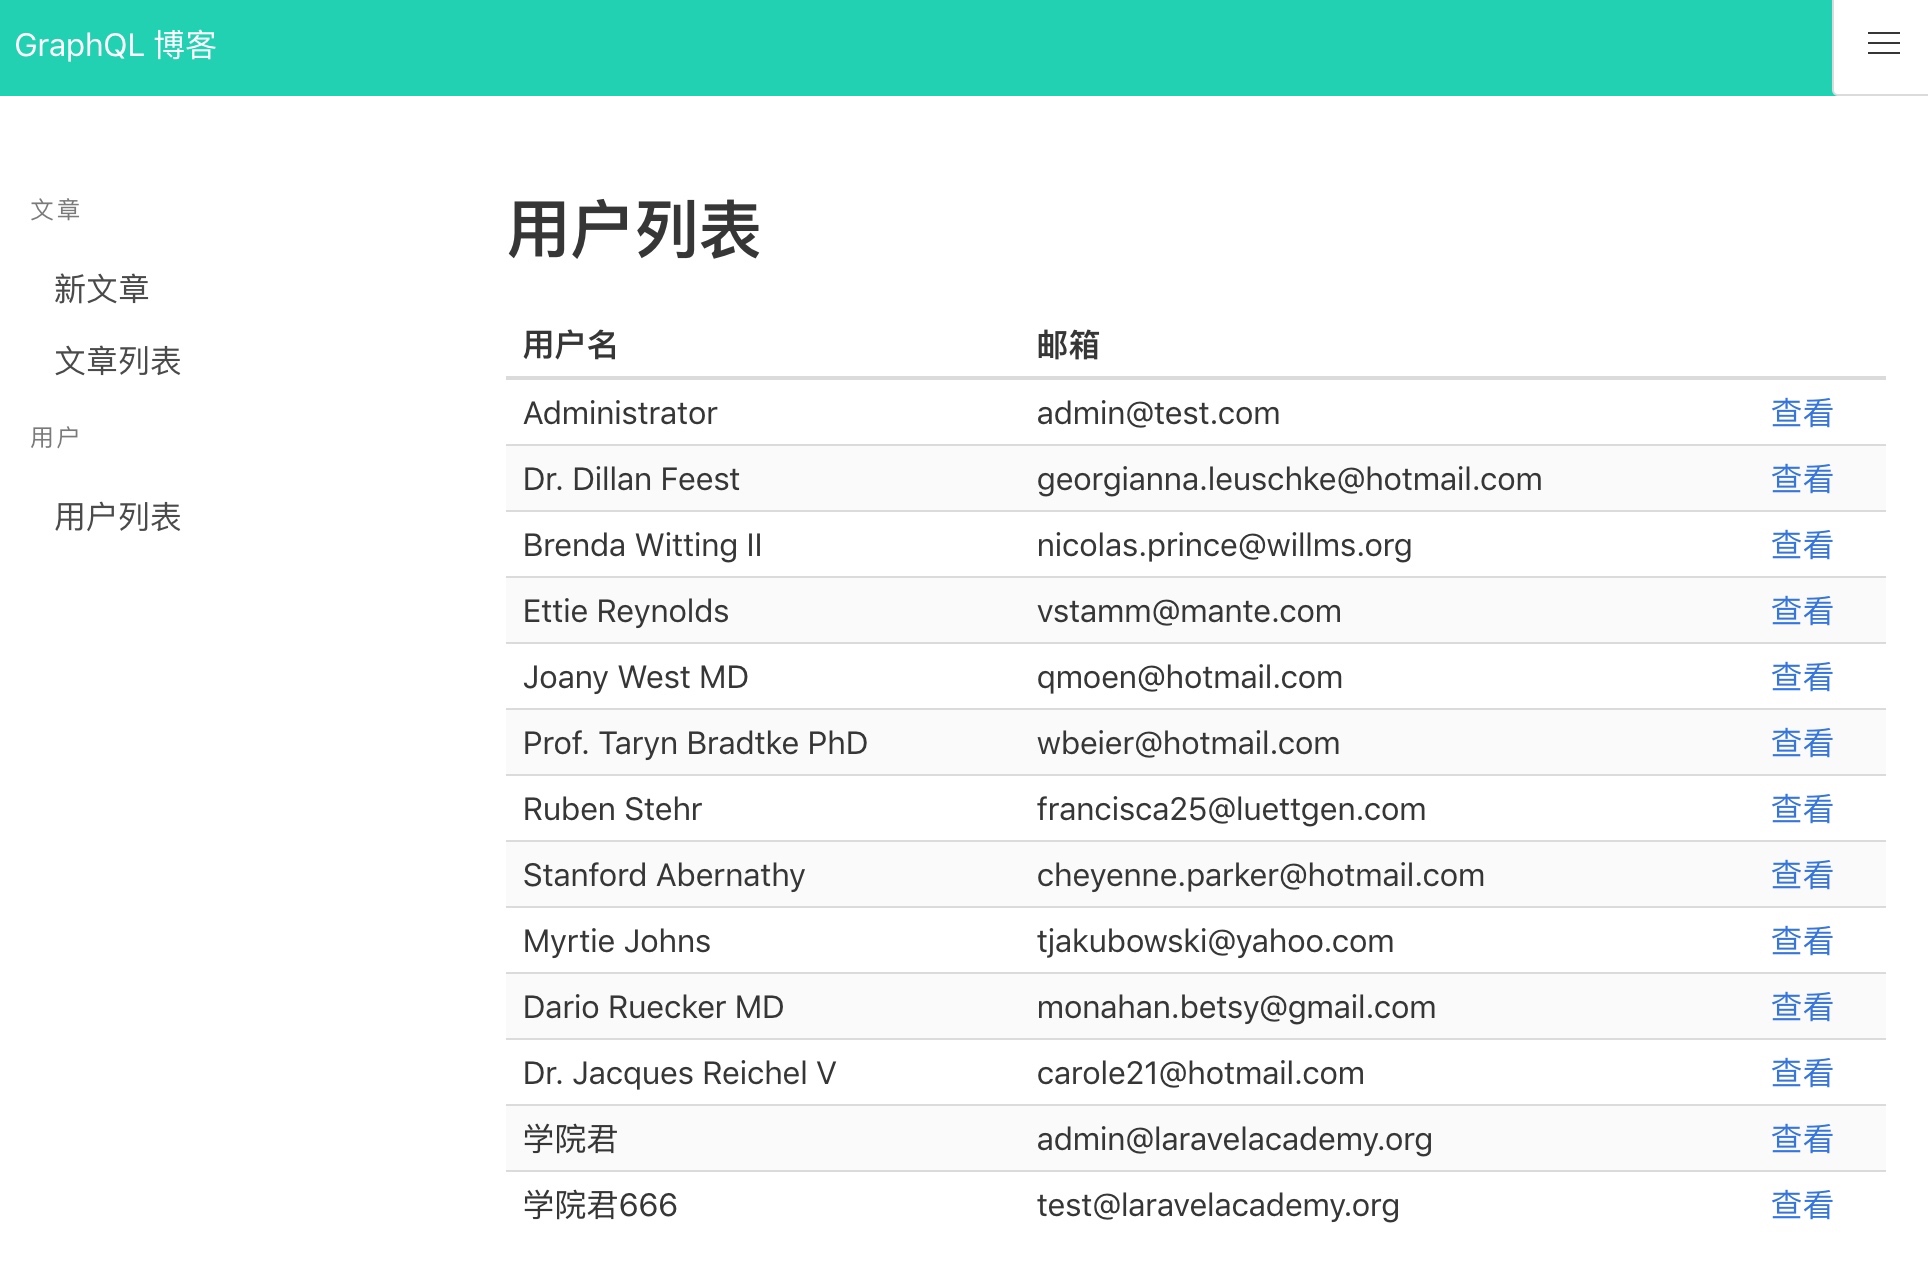
再次运行 npm run build 就可以在浏览器中通过 http://apollo-blog.test/#/admin/users 访问用户列表了:
 

访问用户详情页
用户详情后端接口
我们设想的用户详情页不仅展示用户属性信息,还要展示用户发表的文章数,所以我们需要在之前 API 系列教程一 中创建的articles 表中新增 user_id 字段以便和用户建立关联。
文章表新增 user_id 字段
先在 Laravel 应用根目录运行 Artisan 命令创建迁移文件:
php artisan make:migration alter_articles_add_user_id --table=articles
然后编辑刚生成的 AlterArticlesAddUserId 类:
use Illuminate\Support\Facades\Schema;
use Illuminate\Database\Schema\Blueprint;
use Illuminate\Database\Migrations\Migration;

class AlterArticlesAddUserId extends Migration
{
    /**
     * Run the migrations.
     *
     * @return void
     */
    public function up()
    {
        Schema::table('articles', function (Blueprint $table) {
            $table->integer('user_id')->after('body')->unsigned()->default(0);
        });
    }

    /**
     * Reverse the migrations.
     *
     * @return void
     */
    public function down()
    {
        Schema::table('articles', function (Blueprint $table) {
            $table->dropColumn('user_id');
        });
    }
}
运行迁移将变更更新到数据表:
php artisan migrate
此外我们还要编辑之前的填充器 ArticlesTableSeeder 来填充 user_id 字段值:
class ArticlesTableSeeder extends Seeder
{
    /**
     * Run the database seeds.
     *
     * @return void
     */
    public function run()
    {
        // Let's truncate our existing records to start from scratch.
        Article::truncate();

        $faker = \Faker\Factory::create();

        // And now, let's create a few articles in our database:
        for ($i = 0; $i < 50; $i++) {
            Article::create([
                'title' => $faker->sentence,
                'body' => $faker->paragraph,
                'user_id' => random_int(1, 14)
            ]);
        }
    }
}
运行填充器填充数据:
php artisan db:seed --class=ArticlesTableSeeder
定义 GraphQL 关联查询
关于关联查询的定义我们在 API 系列教程五中已经演示过,这里依葫芦画瓢。先创建一个新的 GraphQL 类型 Article:
php artisan make:graphql:type ArticleType
编写刚生成的 ArticleType 类型类:
namespace App\GraphQL\Type;

use GraphQL\Type\Definition\Type;
use Folklore\GraphQL\Support\Type as BaseType;
use GraphQL;

class ArticleType extends BaseType
{
    protected $attributes = [
        'name' => 'Article',
        'description' => 'An Article'
    ];

    public function fields()
    {
        return [
            'id' => [
                'type' => Type::nonNull(Type::string()),
                'description' => 'The id of the article'
            ],
            'title' => [
                'type' => Type::nonNull(Type::string()),
                'description' => 'The title of the article'
            ],
            'content' => [
                'type' => Type::nonNull(Type::string()),
                'description' => 'The body of the article'
            ]
        ];
    }

    protected function resolveContentField($root, $args)
    {
        return $root->body;
    }
}
在 config/graphql.php 的 types 配置中新增 Article 类型:
'types' => [
    ... // other types
    'Article' => \App\GraphQL\Type\ArticleType::class,
],
接下来在 User 模型类中定义关联关系:
public function posts()
{
    return $this->hasMany(Article::class, 'user_id', 'id');
}
然后在 UserType 类的 fields 方法返回字段中新增 posts 字段:
public function fields()
{
    return [
        ... // other fields
        'posts' => [
            'type' => Type::listOf(GraphQL::type('Article')),
            'description' => 'The articles by the user'
        ]
    ];
}
同时在 UserType 类中新增 posts 字段对应获取方法:
protected function resolvePostsField($root, $args)
{
    if (isset($args['id'])) {
        return $root->posts->where('id', $args['id']);
    }

    return $root->posts;
}
最后为用户详情页定义单独的查询接口:
php artisan make:graphql:query UserQueryById
编写 UserQueryById 类代码如下:
namespace App\GraphQL\Query;

use App\User;
use Folklore\GraphQL\Support\Query;
use GraphQL\Type\Definition\ResolveInfo;
use GraphQL\Type\Definition\Type;
use GraphQL;

class UserQueryById extends Query
{
    protected $attributes = [
        'name' => 'QueryUserById',
        'description' => 'A query'
    ];

    public function type()
    {
        return GraphQL::type('User');
    }

    public function args()
    {
        return [
            'id' => ['name' => 'id', 'type' => Type::string()]
        ];
    }

    public function resolve($root, $args, $context, ResolveInfo $info)
    {
        if (empty($args['id'])) {
            throw new \InvalidArgumentException('请传入用户ID!');
        }
        $user = User::find($args['id']);
        return $user;
    }
}
在 config/graphql.php 中注册新的查询类:
'schemas' => [
    'default' => [
        'query' => [
            ... // other queries
            'user' => \App\GraphQL\Query\UserQueryById::class,
        ],
        // mutations
    ]
],
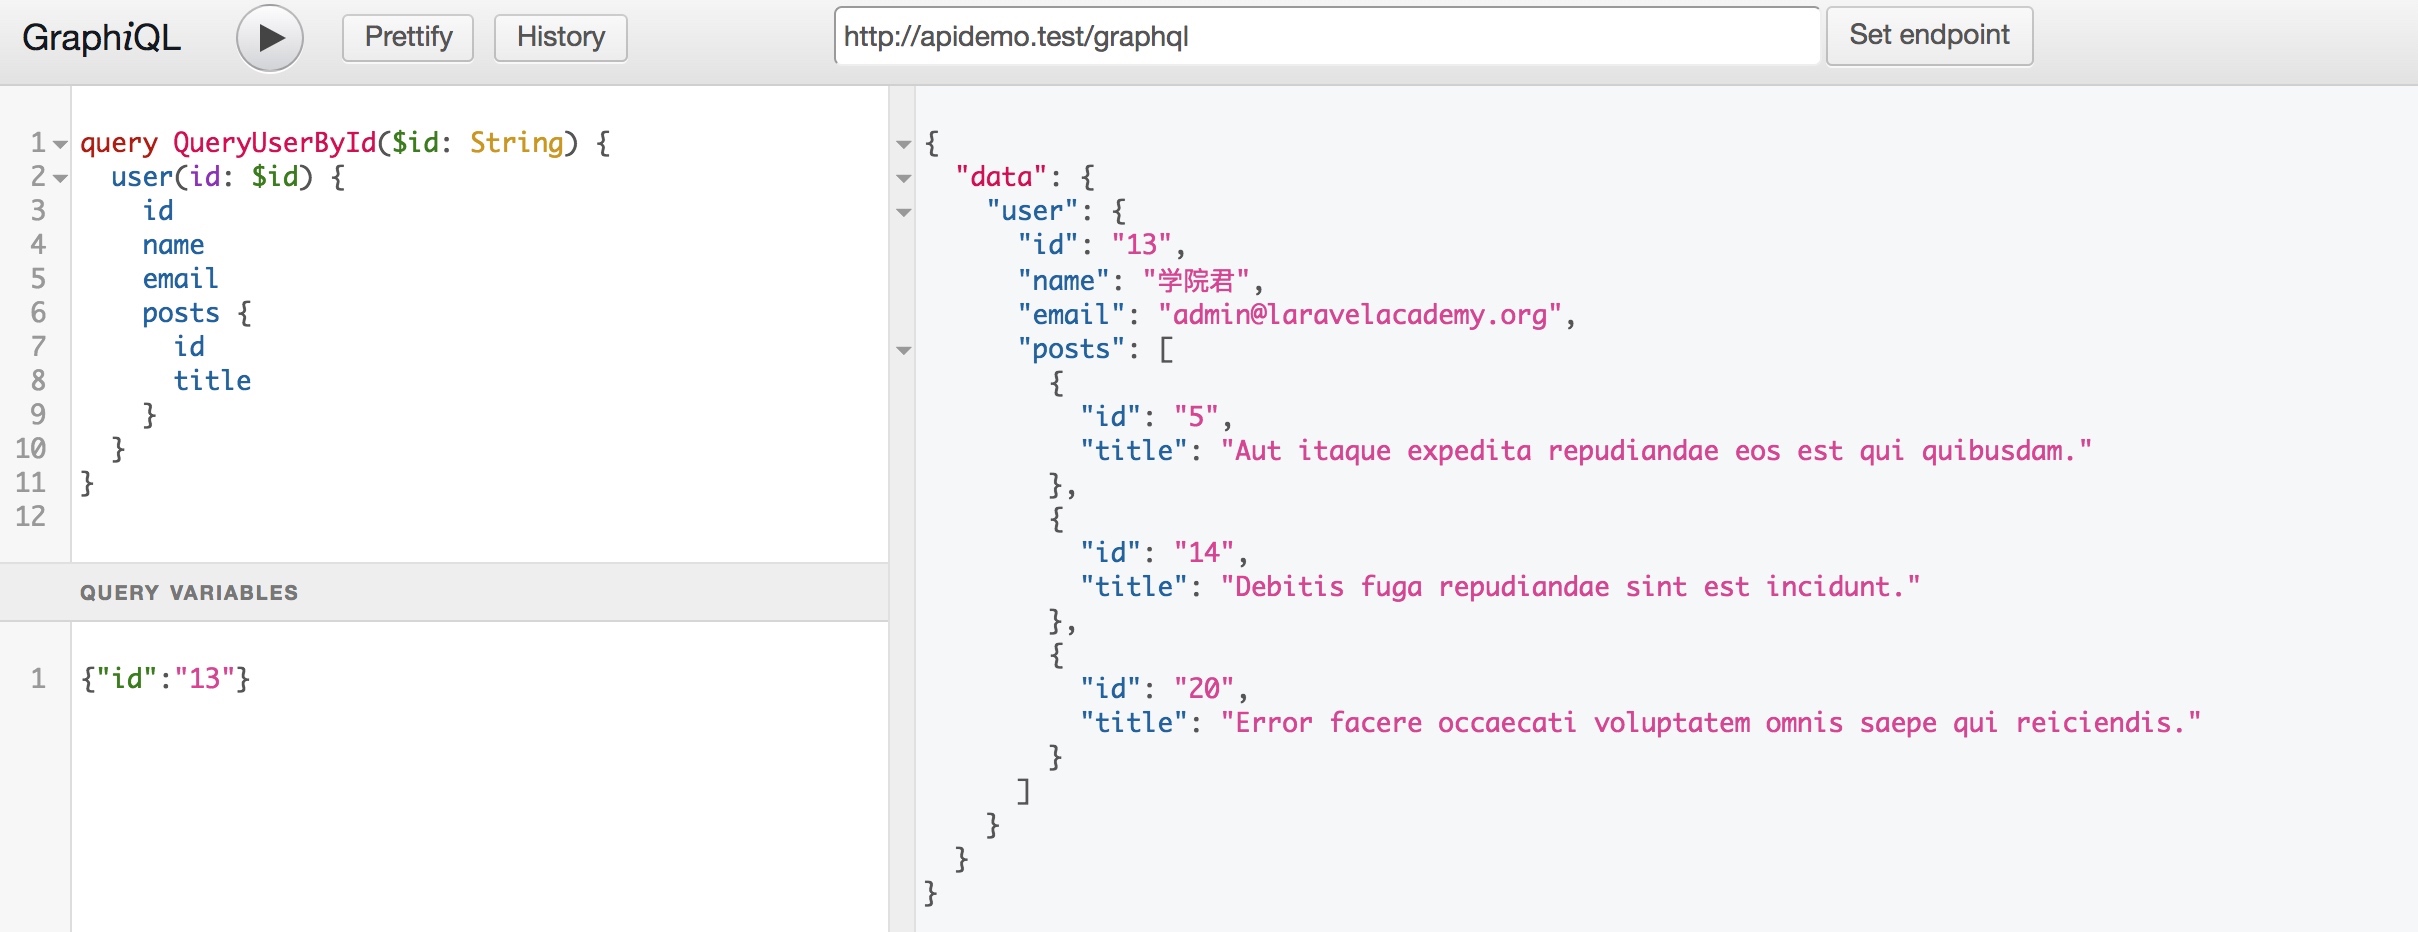
这样就可以在 GraphiQL 中进行测试了:
 

前端用户详情页实现
定义 GraphQL Query
首先还在 src/graphql.js 中定义 GraphQL 查询语句:
export const USER_QUERY = gql`
    query UserQueryById($id: String) {
        user(id: $id) {
            id
            name
            email
            posts {
                id
            }
        }
    }
`
创建 UserDetail 组件
在 components/Admin 目录下新增用户详情组件 UserDetail.vue:
<template>
    <section class="section">
        <div class="container">
            <div class="columns">
                <div class="column is-3">
                    <Menu/>
                </div>
                <div class="column is-9">
                    <h2 class="title">用户详情</h2>

                    <div class="field is-horizontal">
                        <div class="field-label is-normal">
                            <label class="label">用户名</label>
                        </div>
                        <div class="field-body">
                            <div class="field">
                                <p class="control">
                                    <input class="input is-static" :value="user.name" readonly>
                                </p>
                            </div>
                        </div>
                    </div>

                    <div class="field is-horizontal">
                        <div class="field-label is-normal">
                            <label class="label">邮箱</label>
                        </div>
                        <div class="field-body">
                            <div class="field">
                                <p class="control">
                                    <input class="input is-static" :value="user.email" readonly>
                                </p>
                            </div>
                        </div>
                    </div>

                    <div class="field is-horizontal">
                        <div class="field-label is-normal">
                            <label class="label">文章数</label>
                        </div>
                        <div class="field-body">
                            <div class="field">
                                <p class="control">
                                    <input class="input is-static" :value="user.posts.length" readonly>
                                </p>
                            </div>
                        </div>
                    </div>
                </div>
            </div>
        </div>
    </section>
</template>

<script>
import Menu from '@/components/Admin/Menu'
import { USER_QUERY } from '@/graphql'

export default {
  name: 'UserDetail',
  components: {
    Menu
  },
  data () {
    return {
      user: '',
      id: this.$route.params.id
    }
  },
  apollo: {
    // fetch user by ID
    user: {
      query: USER_QUERY,
      variables () {
        return {
          id: this.id
        }
      }
    }
  }
}
</script>
我们在用户详情页展示了用户名、邮箱和该用户发布文章数。USER_QUERY 查询需要传递用户ID参数到服务端,我们可以从路由参数中获取用户ID,两者之间的连接的桥梁是 variables 函数,该函数返回包含从路由获取到的用户ID对象并将其传递给 GraphQL 查询。
为用户详情页注册路由
在 src/router/index.js 文件中的合适位置插入以下代码:
import UserDetail from '@/components/Admin/UserDetail'

// 将下面的代码添加到 `routes` 数组最后
{
  path: '/admin/users/:id',
  name: 'UserDetail',
  component: UserDetail,
  props: true
},
这样我们就可以在运行 npm run build 之后在浏览器中通过类似 http://apollo-blog.test/#/admin/users/13 这样的 URL 访问指定用户详情了:
 

下一篇我们将演示文章发布(需认证)、文章列表和文章详情页开发。

1 条评论
User Error: expected iterable, but did not find one for field Query.user. 这种是什么错误呢?