基于 Swoole 开发实时在线聊天室(二):后台数据库准备和 API 认证功能实现
上篇教程我们为聊天室项目准备好了开发环境并对项目进行了初始化,今天我们来设置数据库并完成简单的 API 认证功能。
数据库准备
关于数据库这块,我们需要为 Laravel 自带的用户表新增头像字段,然后创建一张消息表用于存放用户发送的消息,以便对历史消息进行查询。
更新用户表
首先,我们运行如下 Artisan 命令生成数据库迁移文件为用户表 users 新增头像字段:
php artisan make:migration alter_users_add_avatar_column --table=users编辑刚刚自动生成的位于 database\migrations 目录下的 AlterUsersAddAvatarColumn 类:
<?php

use Illuminate\Support\Facades\Schema;
use Illuminate\Database\Schema\Blueprint;
use Illuminate\Database\Migrations\Migration;

class AlterUsersAddAvatarColumn extends Migration
{
    /**
     * Run the migrations.
     *
     * @return void
     */
    public function up()
    {
        Schema::table('users', function (Blueprint $table) {
            $table->string('avatar')->after('password')->nullable()->comment('用户头像');
        });
    }

    /**
     * Reverse the migrations.
     *
     * @return void
     */
    public function down()
    {
        Schema::table('users', function (Blueprint $table) {
            $table->dropColumn('avatar');
        });
    }
}
我们为 users 表新增了 avatar 字段用于存放用户头像路径。
创建消息表
接下来,我们通过如下 Artisan 命令创建消息模型和对应的数据表迁移文件:
php artisan make:model Message -m
该命令会在 app 目录下创建 Message 模型类,同时在 database/migrations 目录下生成对应的数据库迁移文件。编辑刚刚生成的 CreateMessagesTable 类代码如下:
<?php

use Illuminate\Support\Facades\Schema;
use Illuminate\Database\Schema\Blueprint;
use Illuminate\Database\Migrations\Migration;

class CreateMessagesTable extends Migration
{
    /**
     * Run the migrations.
     *
     * @return void
     */
    public function up()
    {
        Schema::create('messages', function (Blueprint $table) {
            $table->bigIncrements('id');
            $table->string('msg')->comment('文本消息');
            $table->string('img')->comment('图片消息');
            $table->bigInteger('user_id');
            $table->smallInteger('room_id');
            $table->timestamp('created_at');
        });
    }

    /**
     * Reverse the migrations.
     *
     * @return void
     */
    public function down()
    {
        Schema::dropIfExists('messages');
    }
}
在存放用户发送消息的 messages 表中,我们通过 msg 字段存放文本消息,img 字段存放图片消息(一条消息只包含一张图片),user_id 用于和用户记录关联,room_id 用于和房间关联,由于消息发送后不可更改,所以我们只设置了创建时间字段 created_at。
运行迁移命令
以 Laradock 作为开发环境为例,接下来,我们在 laradock 项目目录下运行如下命令启动容器(确保 Docker 已经启动,已启动忽略):
docker-compose up -d nginx mysql redis
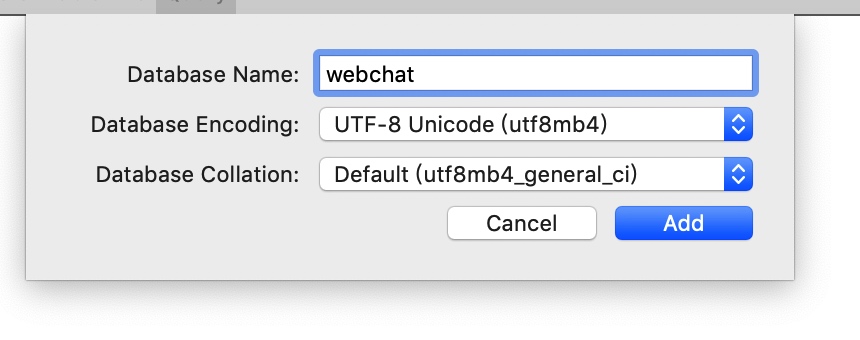
然后连接到本地 MySQL 数据库,创建用于聊天室项目的 webchat 数据库:

数据编码格式请选择 utf8mb4,以便支持 emoji 表情。
然后通过 docker exec -it laradock_workspace_1 bash 命令进入 laradock_workspace_1 Bash 界面,并进入 var/www/webchat 目录运行如下数据库迁移命令让上述数据表变更生效:
php artisan migrate
此时刷新 webchat 数据库,就可以看到 users 表和 messages 表了:

API 认证实现
数据库准备好了之后,接下来,我们来实现用户认证功能,因为用户登录后才能发送消息。
由于我们最终要实现的是前后端分离应用,所以后台需要提供的是基于 API 的用户认证,为了简化流程,我们这里基于 Laravel 自带的、最简单的 token 驱动实现 API 认证(即 config/auth.php 中默认的 api 守卫,如果你想要在生产环境使用,建议基于 Passport 进行 API 认证,这样更安全)。关于其具体实现,可以参考官方提供的 API 认证文档 。
在用户表中新增令牌字段
根据官方文档介绍,我们还需要在 users 表中新增一个字段用于存放令牌,以便用户首次登录后通过该令牌进行后续认证,该令牌在这个简单的 API 认证实现中会在用户注册时生成,而且后续不再改变。我们通过下面这个 Artisan 命令生成数据库迁移文件:
php artisan make:migration alter_users_add_api_token --table=users然后编辑 AlterUsersAddApiToken 类实现代码如下:
<?php

use Illuminate\Support\Facades\Schema;
use Illuminate\Database\Schema\Blueprint;
use Illuminate\Database\Migrations\Migration;

class AlterUsersAddApiToken extends Migration
{
    /**
     * Run the migrations.
     *
     * @return void
     */
    public function up()
    {
        Schema::table('users', function (Blueprint $table) {
            $table->string('api_token')
                ->after('remember_token')
                ->unique();
        });
    }

    /**
     * Reverse the migrations.
     *
     * @return void
     */
    public function down()
    {
        Schema::table('users', function (Blueprint $table) {
            $table->dropColumn('api_token');
        });
    }
}
这个存放令牌的字段叫做 api_token,我们为其设置了唯一索引,然后在 laradock_workspace_1 容器中运行迁移命令让这个更改生效:
php artisan migrate用户注册和登录功能实现
接下来,我们来创建用于实现 API 认证的控制器 AuthController:
php artisan make:controller AuthController然后在刚刚创建的 app/Http/Controllers/AuthController.php 中编写注册方法代码如下:
<?php

namespace App\Http\Controllers;

use App\User;
use Illuminate\Http\Request;
use Illuminate\Support\Str;
use Illuminate\Support\Facades\Hash;
use Illuminate\Support\Facades\Validator;

class AuthController extends Controller
{
    public function register(Request $request)
    {
        // 验证注册字段
        Validator::make($request->all(), [
            'name' => ['required', 'string', 'max:255'],
            'email' => ['required', 'string', 'email', 'max:255', 'unique:users'],
            'password' => ['required', 'string', 'min:6']
        ])->validate();

        // 在数据库中创建用户并返回包含 api_token 字段的用户数据
        return User::create([
            'name' => $request->input('name'),
            'email' => $request->input('email'),
            'password' => Hash::make($request->input('password')),
            'api_token' => Str::random(60)
        ]);
    }
}
在注册方法 register 中,首先验证用户输入注册字段是否满足指定规则,如果验证通过则创建一条新的用户记录完成注册流程,在新增用户记录时,还插入了 api_token 字段,这里我们将其设置为随机字符串。
为了让上述批量(字段)赋值生效,还需要在 User 类的 $fillable 属性中新增 api_token 字段:
protected $fillable = [
    'name', 'email', 'password', 'api_token'
];
接下来,我们在 AuthController 中编写登录方法实现代码如下:
public function login(Request $request)
{
    // 验证登录字段
    $request->validate([
        'email' => 'required|string',
        'password' => 'required|string',
    ]);

    $email = $request->input('email');
    $password = $request->input('password');
    $user = User::where('email', $email)->first();
    // 用户校验成功则返回 Token 信息
    if ($user && Hash::check($password, $user->password)) {
        return response()->json(['user' => $user, 'success' => true]);
    }

    return  response()->json(['success' => false]);
}
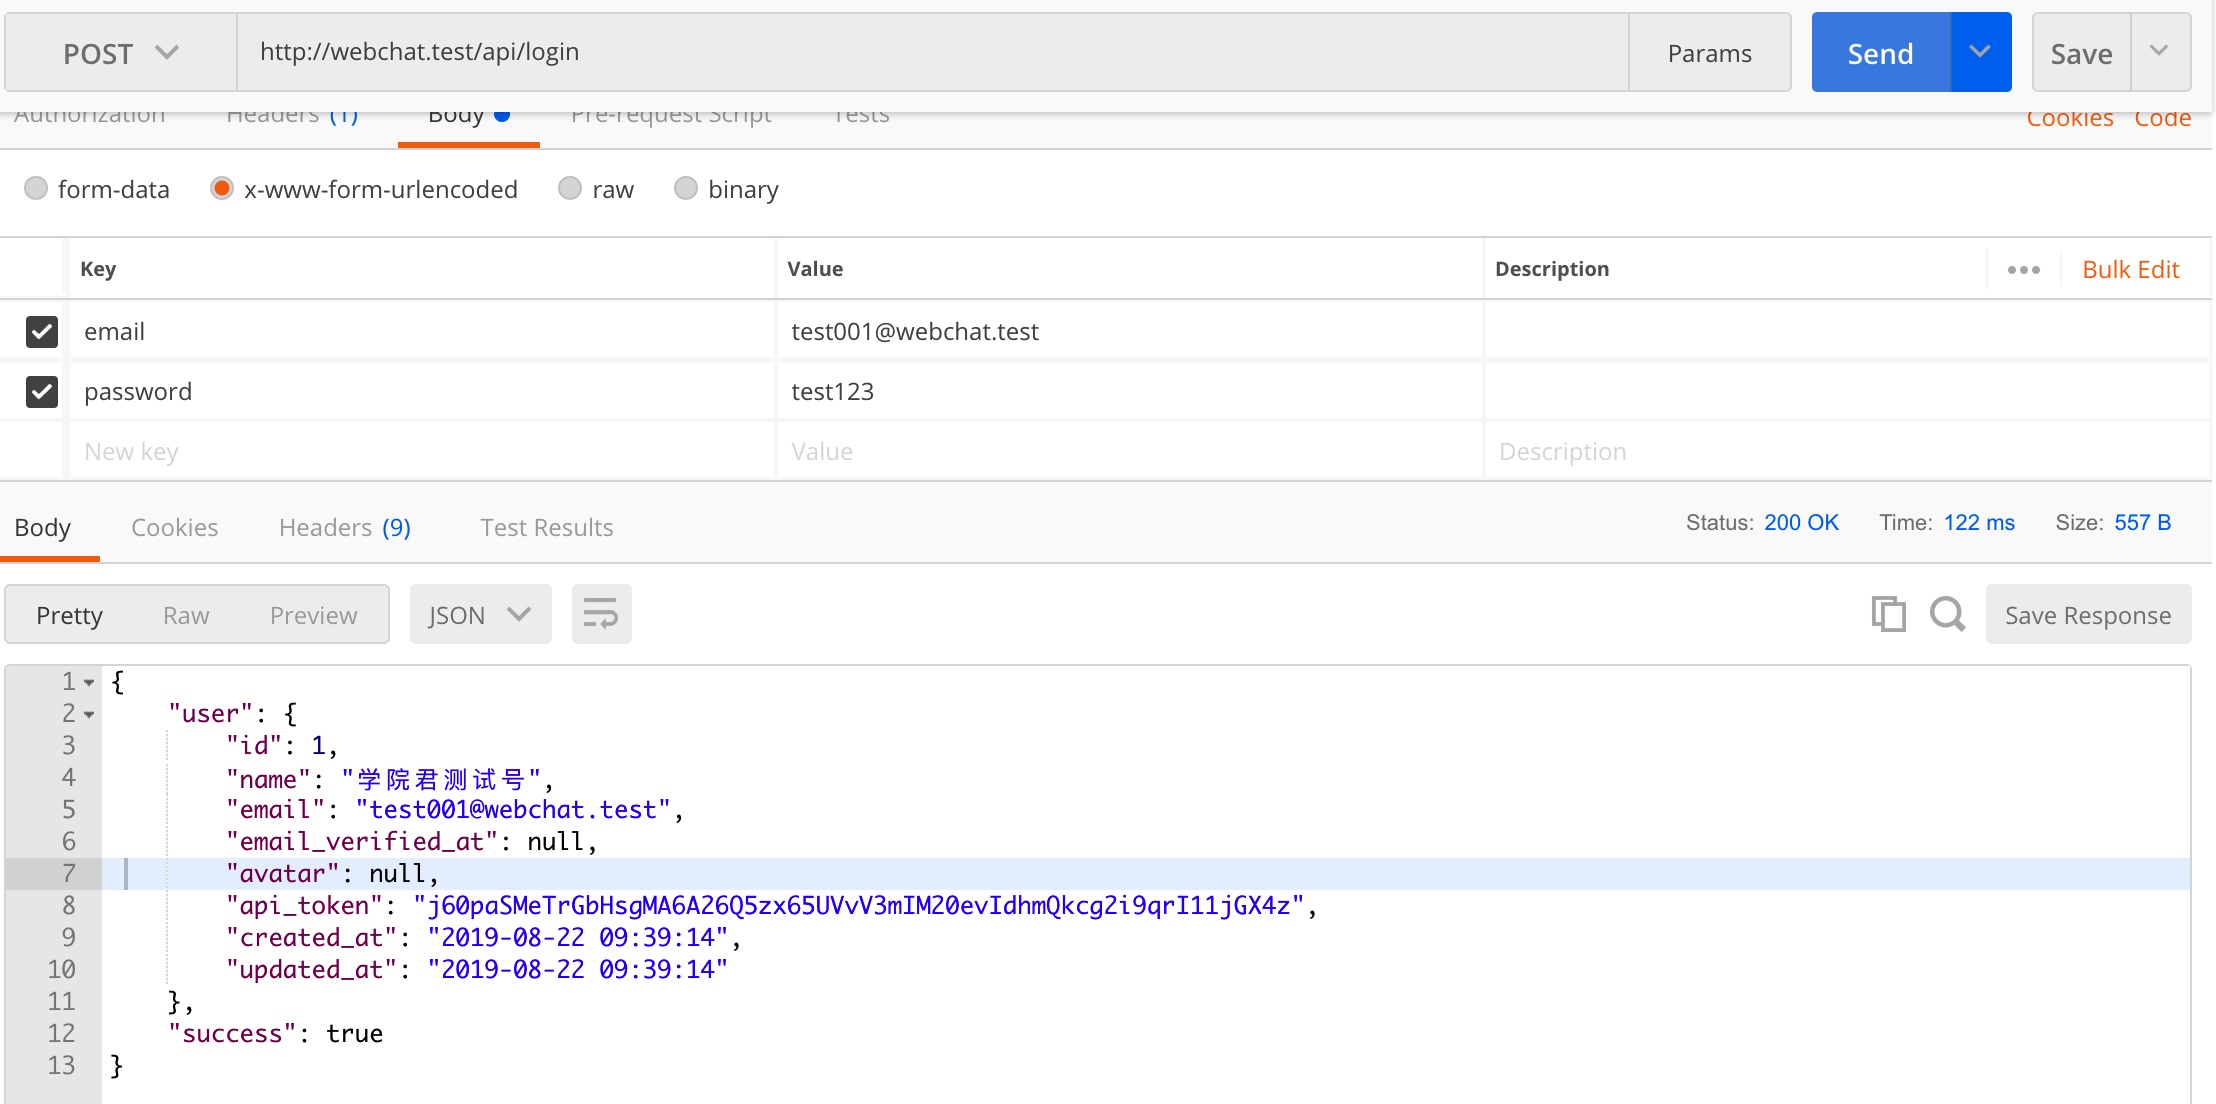
也很简单,先验证用户输入的登录字段是否满足验证规则,如果通过验证,则通过 email 字段从数据库查询对应的用户记录,如果存在且密码校验通过,则返回包含 api_token 字段的用户数据,后续用户就可以通过在请求中带上这个令牌字段进行认证,Laravel 默认支持通过三种方式设置请求令牌,分别是查询字符串、表单请求参数以及 Bearer Token。如果用户记录不存在或者密码校验不通过,则返回登录失败信息。
最后在 routes/api.php 中定义注册和登录路由:
Route::post('/register', 'AuthController@register');
Route::post('/login', 'AuthController@login');
通过 Postman 测试 API 认证
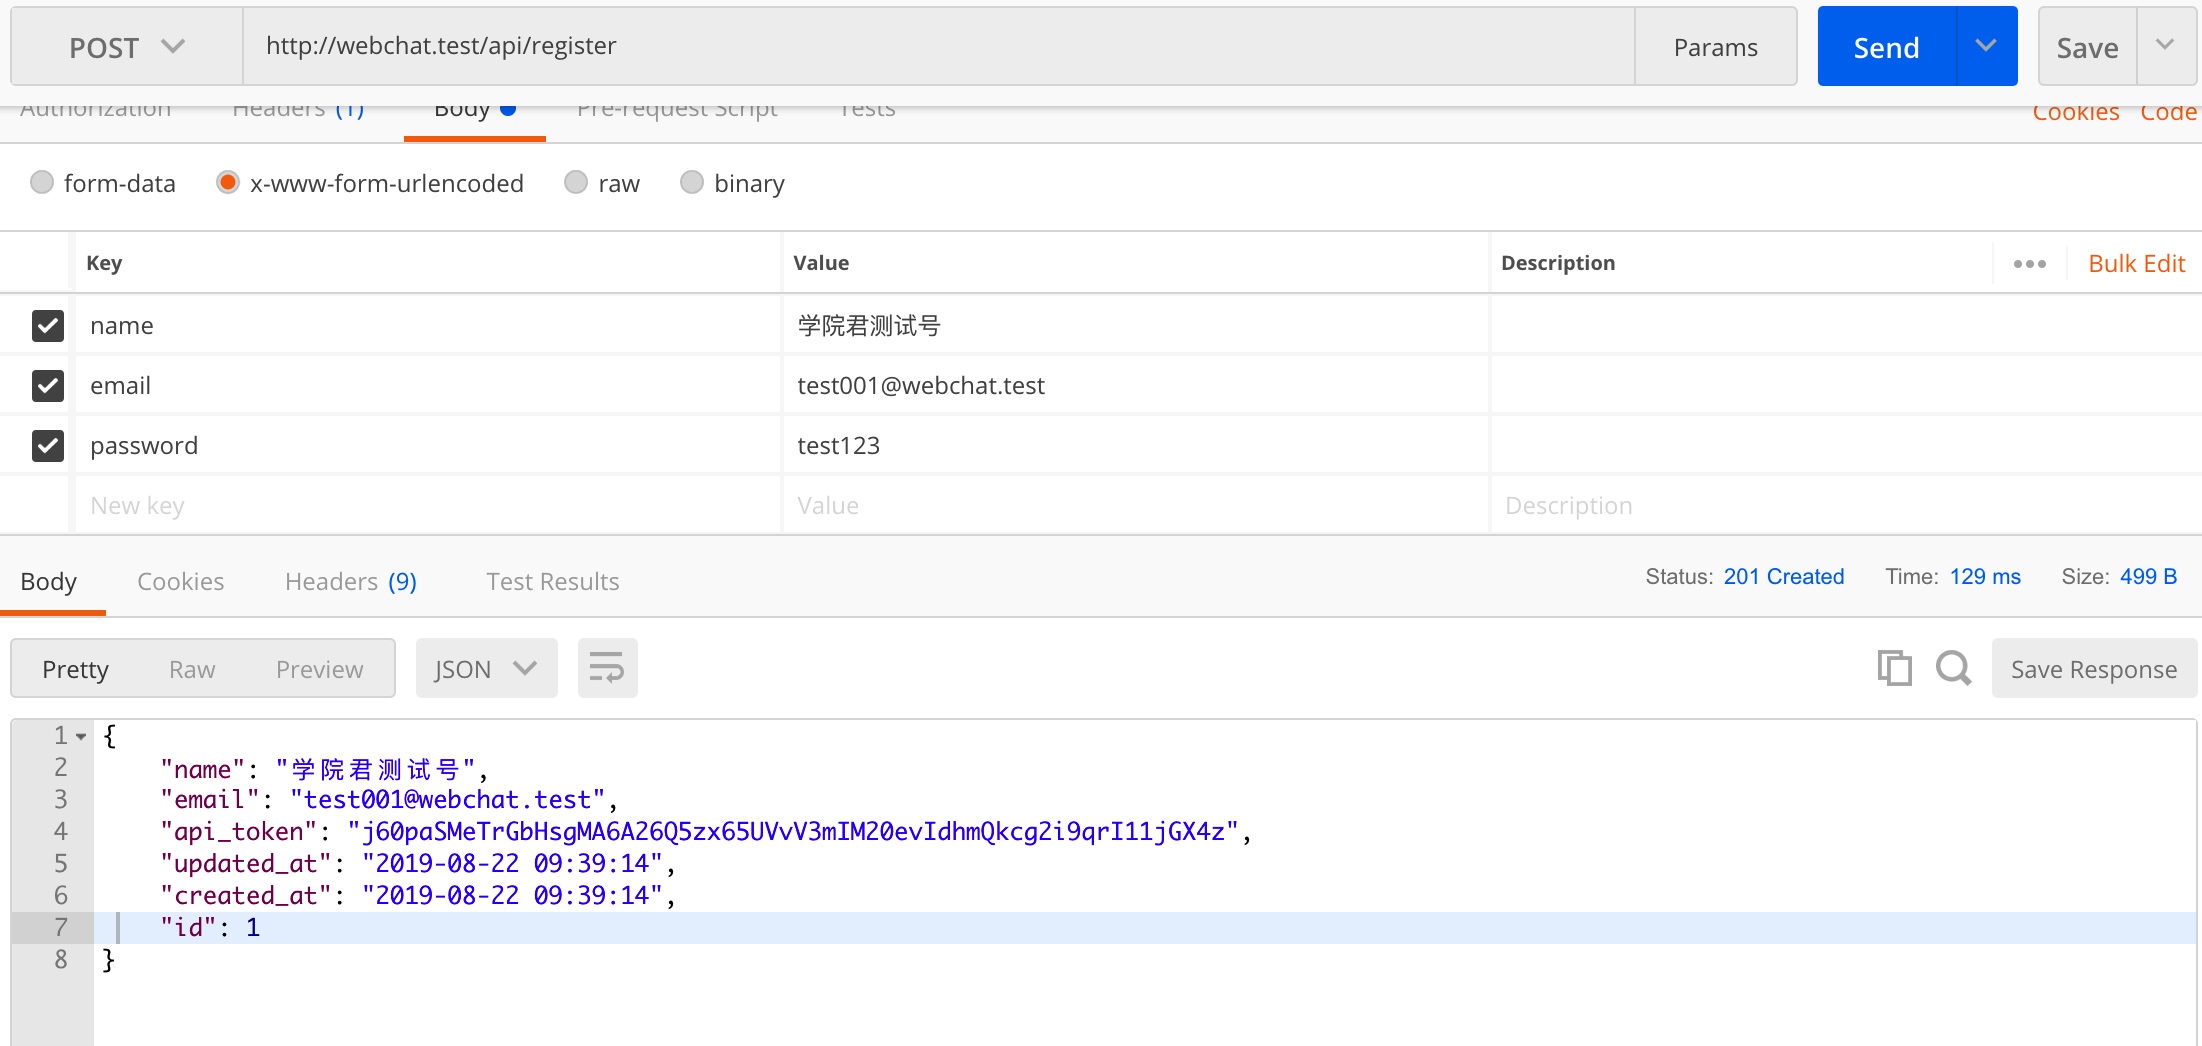
接下来,我们来简单测试下基于 Token 令牌的 API 认证,打开 Postman,首先访问基于 API 的注册功能,以 POST 方式请求 http://webchat.test/api/register 路由,并在请求实体中添加注册所需的字段,注册成功,则返回新创建的用户数据,包含令牌字段,后续你可以直接通过这个令牌进行 API 认证:

然后,我们来测试下登录路由,同样以 POST 方式请求 http://webchat.test/api/login,在请求实体中添加登录字段,登录成功返回包含令牌字段的用户数据和成功标识,后续就可以通过返回数据中的令牌值进行 API 认证:

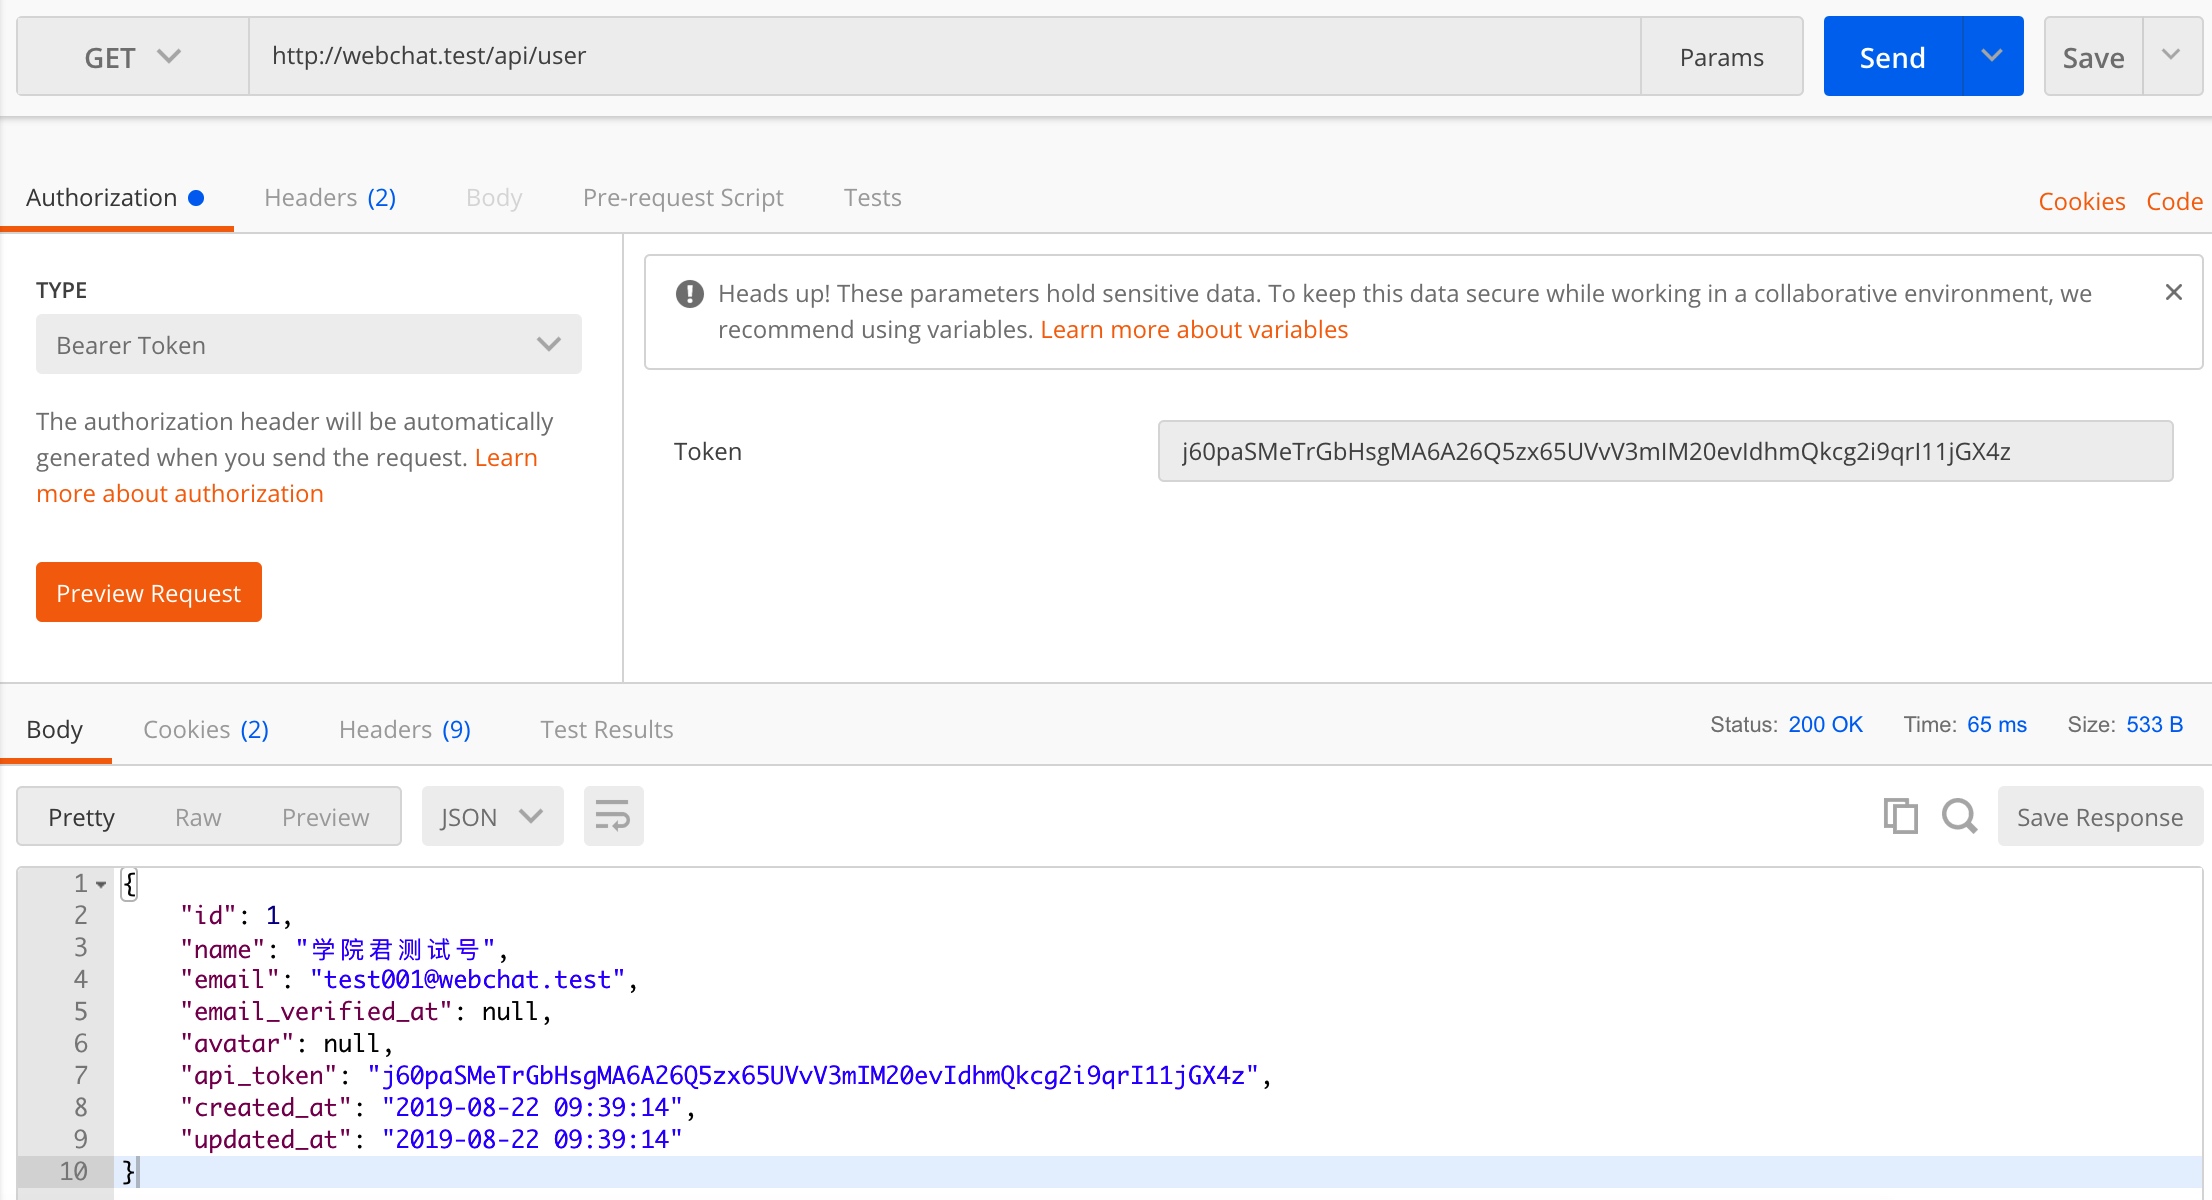
有了令牌值以后,我们就可以在请求数据中带上这个令牌来访问认证路由,比如 Laravel 自带的 http://webchat.test/api/user,我们以 GET 方式对其进行请求,然后设置认证方式为 Bearer Token,并在右侧的 Token 输入框输入注册或登录成功后返回的 api_token 字段值,这样,就可以获取到认证资源了,表示 API 认证成功:


7 Comments
支持一下,學院君你太赞了
期待这个系列的后续
php artisan migrate -v 报错 The server requested authentication method unknown to the client [caching_sha2_password]")
已解决
MySQL 版本是多少 5.8 会有这个问题,参考下这个解决方案:https://stackoverflow.com/questions/50026939/php-mysqli-connect-authentication-method-unknown-to-the-client-caching-sha2-pa
最近做了个开源项目https://gitee.com/song-bo/LvaCMS
这个token认证,laravels需要添加清除器,否则guards被缓存在单例中,导致一处登录所有设备都能访问了。
修改
config/laravels.php文件,添加如下配置: