十分钟搭建博客系统
本节开始我们将正式开始博客项目的代码编写,借助于 Laravel 5.1 的强大功能,我们可以在十分钟内搭建起一个博客应用,当然这其中不包括任何花里胡哨的点缀之物,也不包括后台管理系统(这些我们在后续章节中会一一加进来)。
1、创建文章数据表及其模型(0:00~2:30)
我们已经在上一节中为博客项目完成了大部分准备工作,现在首先要做的就是为这个项目创建一个新的文章表posts 及该表对应的模型类 Post,使用如下Artisan命令即可完成这两个创建工作:
php artisan make:model --migration Post上述命令会做两件事情:
- 在
app目录下创建模型类App\Post; - 创建用于创建
posts表的迁移,该迁移文件位于database/migrations目录下。
注:如果不了解什么是迁移,可参考 Laravel 迁移文档。编辑
database/migrations 目录下刚生成的这个迁移文件内容如下:
<?php

use Illuminate\Database\Schema\Blueprint;
use Illuminate\Database\Migrations\Migration;

class CreatePostsTable extends Migration
{

    /**
     * Run the migrations.
     */
    public function up()
    {
        Schema::create('posts', function (Blueprint $table) {
            $table->increments('id');
            $table->string('slug')->unique();
            $table->string('title');
            $table->text('content');
            $table->timestamps();
            $table->timestamp('published_at')->index();
        });
    }

    /**
     * Reverse the migrations.
     */
    public function down()
    {
        Schema::drop('posts');
    }
}
我们在默认生成的迁移文件基础上新增四个额外的列:
-
slug:将文章标题转化为URL的一部分,以利于SEO -
title:文章标题 -
content:文章内容 -
published_at:文章正式发布时间
~/Code/vagrant/blog)运行迁移命令:
php artisan migrate最后修改生成的默认
app/Post.php 文件内容如下:
<?php

namespace App;

use Illuminate\Database\Eloquent\Model;

class Post extends Model
{
    protected $dates = ['published_at'];

    public function setTitleAttribute($value)
    {
        $this->attributes['title'] = $value;

        if (! $this->exists) {
            $this->attributes['slug'] = str_slug($value);
        }
    }
}
2、使用测试数据填充文章表(2:30~5:00)
有了第一步操作,现在文章已经有了寄身之所,接下来我们不妨创建一些随机数据填充到数据表posts 中。这里我们要用到 Laravel 5.1 的模型工厂功能。
添加如下代码到 database/factories 目录下的 ModelFactory.php 文件中:
$factory->define(App\Post::class, function ($faker) {
    return [
        'title' => $faker->sentence(mt_rand(3, 10)),
        'content' => join("\n\n", $faker->paragraphs(mt_rand(3, 6))),
        'published_at' => $faker->dateTimeBetween('-1 month', '+3 days'),
    ];
});
然后修改 database/seeds 目录下的 DatabaseSeeder.php 内容如下:
<?php

use Illuminate\Database\Seeder;
use Illuminate\Database\Eloquent\Model;

class DatabaseSeeder extends Seeder
{
    /**
     * Run the database seeds.
     */
    public function run()
    {
        Model::unguard();
        $this->call('PostTableSeeder');
    }

}

class PostTableSeeder extends Seeder
{
    public function run()
    {
        App\Post::truncate();
        factory(App\Post::class, 20)->create();
    }
}
最后,还是在 Homestead 虚拟机项目根目录下运行如下 Artisan 命令将随机数据插入数据库:
php artisan db:seed该命令执行成功后,
posts 表中会多出20行记录。
3、创建配置文件(5:00~5:30)
我们还需要为博客做一些配置,比如标题和每页显示文章数。时间不多了,让我们快速行动起来。 在config 目录下创建一个新的配置文件 blog.php,编辑其内容如下:
<?php
return [
        'title' => 'My Blog',
        'posts_per_page' => 5
];
在 Laravel 5.1 中,可以轻松通过帮助函数 config() 访问这些配置项,例如,config('blog.title') 将会返回 title 配置项的值。
此外,如果需要的话你还可以去 config/app.php 修改时区配置。
4、创建路由和控制器(5:30~7:30)
接下来修改app/Http/routes.php 文件如下:
<?php

get('/', function () {
    return redirect('/blog');
});

get('blog', 'BlogController@index');
get('blog/{slug}', 'BlogController@showPost');
这样,如果访问 http://blog.app/ 的话,页面会重定向到 http://blog.app/blog,而访问 http://blog.app/blog 时,会调用 BlogController 的 index 方法来处理业务逻辑并渲染页面。同理访问 http://blog.app/blog/POST-TITLE 时,会调用 BlogController 的 showPost 方法,同时会将 POST-TITLE 的值作为参数传递给 showPost 方法。
下面我们就来创建这个控制器 BlogController。
首先,使用 Artisan 命令生成一个空的控制器:
php artisan make:controller BlogController --plain
注:--plain 命令用于创建一个空的控制器而不是标准的 RESTful 风格控制器。
一个新的 BlogController.php 文件已经生成到 app/Http/Controllers 目录下,编辑其内容如下:
<?php

namespace App\Http\Controllers;

use App\Post;
use Carbon\Carbon;

class BlogController extends Controller
{
    public function index()
    {
        $posts = Post::where('published_at', '<=', Carbon::now())
                ->orderBy('published_at', 'desc')
                ->paginate(config('blog.posts_per_page'));

        return view('blog.index', compact('posts'));
    }

    public function showPost($slug)
    {
        $post = Post::whereSlug($slug)->firstOrFail();
        return view('blog.post')->withPost($post);
    }
}
在控制器中,我们使用 Eloquent ORM 与数据库进行交互,并使用辅助函数 view() 渲染视图。
如果要查看应用中的所有路由,可以使用如下命令:
php artisan route:list
5、创建视图(7:30~10:00)
剩下的就是创建两个视图用来显示结果了:一个用于显示文章列表,一个用于显示文章详情。 在resources/views 目录下创建一个新的目录 blog。然后在该目录下创建一个新的视图文件 index.blade.php。使用 .blade.php 后缀的目的在于告知 Laravel 该视图文件使用 Blade 模板。编辑 index.blade.php 文件内容如下:
<html>
    <head>
        <title>{{ config('blog.title') }}</title>
        <link href="//maxcdn.bootstrapcdn.com/bootstrap/3.3.4/css/bootstrap.min.css" rel="stylesheet">
    </head>
    <body>
        <div class="container">
            <h1>{{ config('blog.title') }}</h1>
            <h5>Page {{ $posts->currentPage() }} of {{ $posts->lastPage() }}</h5>
            <hr>
            <ul>
            @foreach ($posts as $post)
                <li>
                    <a href="/blog/{{ $post->slug }}">{{ $post->title }}</a>
                    <em>({{ $post->published_at }})</em>
                    <p>
                        {{ str_limit($post->content) }}
                    </p>
                </li>
            @endforeach
            </ul>
            <hr>
            {!! $posts->render() !!}
        </div>
    </body>
</html>
十分钟博客的最后一步就是就是创建显示文章详情的视图。在 resources/views/blog 目录下新建视图文件 post.blade.php,编辑其内容如下:
<html>
    <head>
        <title>{{ $post->title }}</title>
        <link href="//maxcdn.bootstrapcdn.com/bootstrap/3.3.4/css/bootstrap.min.css" rel="stylesheet">
    </head>
    <body>
        <div class="container">
            <h1>{{ $post->title }}</h1>
            <h5>{{ $post->published_at }}</h5>
            <hr>
                {!! nl2br(e($post->content)) !!}
            <hr>
            <button class="btn btn-primary" onclick="history.go(-1)">
                « Back
            </button>
        </div>
    </body>
</html>
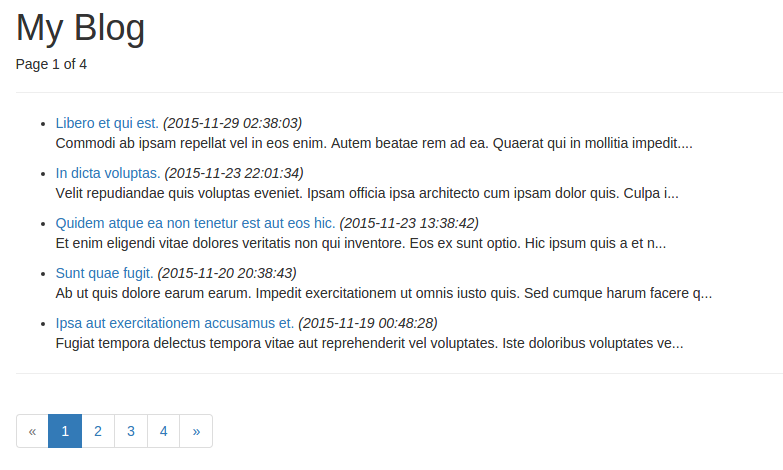
好了,接下来我们可以去浏览器中进行测试了,访问 http://blog.app,页面显示如下:
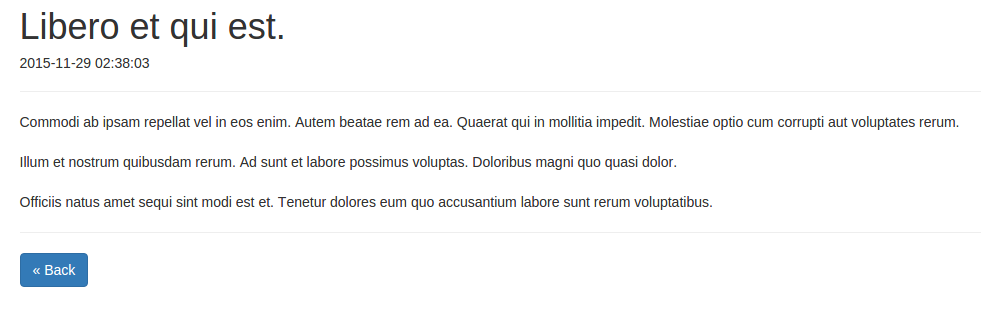
 文章详情页显示如下:
102 Comments